How to get Theme Context path in Liferay CMS velocity template

This is how you  get the theme context path in a velocity webcontent template in Liferay.

#set ($pathThemeImages = $xmlRequest.replaceFirst('(?s).*<path-theme-images>(.*)</path-theme-images>.*', '$1'))
#set ($themeContextName = $pathThemeImages.replaceFirst('http.*//(.*)/(.*)/images', '/$2'))
$themeContextName

Liferay 6.1 Integration with Apache 2.2 and Siteminder 12.5

Hi,
Today Im going to explain you how to integrate Liferay 6.1, Apache 2.2 and Siteminder 12.5 on Windows 2008 64bit Server.

I had to struggle for 2 days to setup the above said integration with lot many errors during siteminder integration.

Setting up Liferay should be straight forward as I explained in my previous posts.
Installing Apache should not be a big deal as well. Follow my post Here
Enable HTTPS on Liferay/Apache
I’ll attach the corresponding config files at the bottom of the post.

Now comes the big fish, Sitemender Webagent installation and configuration with Apache.

I had to install 32-bit Webagent for the 32-bit Apache installation on a 64-bit m/c.

Installation of CA Webagent for apache should be easy.
But I ran into couple issues during the configuration of Webagent. You may not run into the same but just wanted to highlight them. Please refer the Troubleshooting section

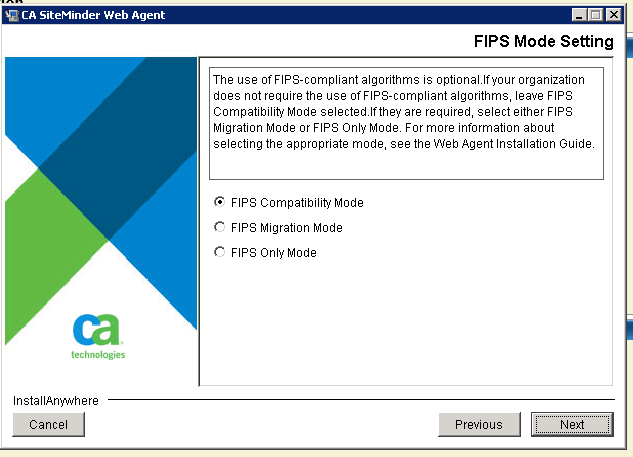
  • Webagent Installation

sm_1

sm_2

sm_3

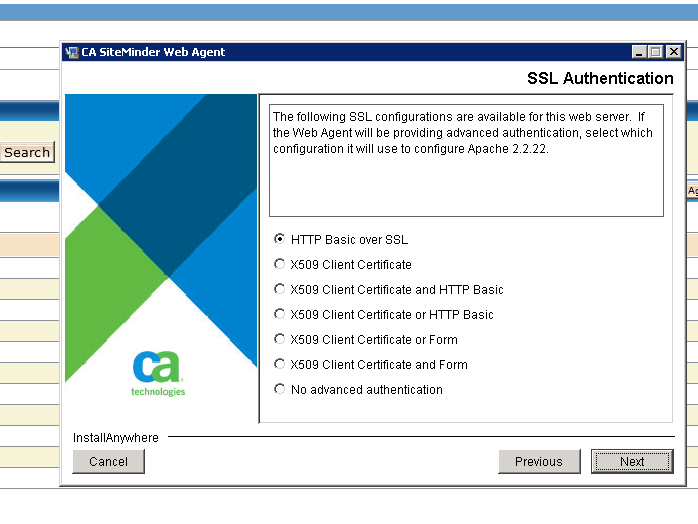
  • Webagent Configuration

sm_2

sm_4

sm_6

sm_7

sm_8

sm_9

sm_10

sm_11

sm_12

sm_13

sm_14

sm_15

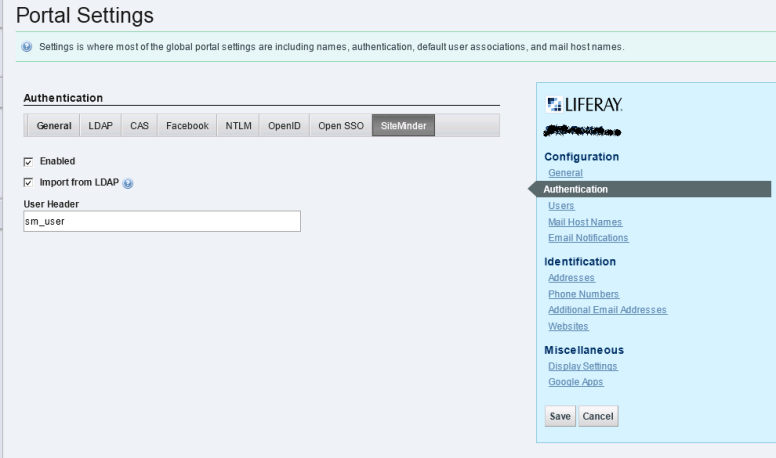
  • Liferay Siteminder Setting

Thats it, your Liferay is now integrated with Siteminder.

  • Attachments

httpd-mod_jk.conf

httpd.conf

ssl.conf

worker.properties

SmHost.conf

WebAgent.conf

  • Troubleshooting
      • Installer jre was unable to load the required dlls during configuration. I had to copy them explicitly from \webagent\install_config_info\lib directory to jre/bin which was used at runtime from a temp directory (Jre will be extracted to a temp directory while the installer is running , just look at the agent-config-debug log to find the location)
      • Apache registry settings where missing. (Actually CA webagent was looking for them in a different location) Make sure you have them at both the places as per the screenshot.

Contact me if you need any assistance.

Thank you!!

Enable HTTPS on Liferay/Apache

Hi,
Today Im going to explain you how to secure your site in Liferay6.1 (HTTPS enabled)
Apache – Liferay Integration

SSLCertificateFile "D:/Apache2.2/conf/server.cer"
SSLCertificateKeyFile "D:/Apache2.2/conf/server.key"
  • We created necessary certificates for apache web server, now add the following configuration at the bottom of {APACHE_HOME}\conf\httpd.conf file.
Include conf/ssl.conf

<IfModule ssl_module>
SSLRandomSeed startup builtin
SSLRandomSeed connect builtin
</IfModule>

RewriteEngine On

RewriteCond %{HTTPS} !=on
RewriteRule ^/?(.*) https://%{SERVER_NAME}/$1 [R,L]

ProxyRequests On
ProxyPreserveHost On
ProxyPass / http://myliferay.com:8080/
ProxyPassReverse / http://myliferay.com:8080/

Note : Include all modules realted to Rewrite and Proxy in httpd.conf file

  • You ar done, just restart the Apache web server now!!.

BeanShell Scripting in Liferay

Hi,
Today Im going to explain you how to run a BeanShell Script in Liferay6.1.
Just for now consider “If you can code in Java, you can code in BeanShell as well”.

I had a requirement to assign some UserGroups to Roles which exists with the same name as UserGroup.
I had 1000s of Groups and 1000s of Roles in the System. I was looking to accomplish the task programatically rather than manually. Then came to my rescue is the BeanShell Scripting.
Before looking into the code we’ll just see what are the implicit Liferay objects availble in BeanShell.

  • Implicit Objects
  • portletConfig, portletContext, actionRequest, actionResponse, out
    
  • Here is the script to assign UserGroups to Roles. The UserGroup will be created if it doesn’t exist.
  • 
    		import com.liferay.portal.model.Role;
    		import com.liferay.portal.model.UserGroup;
    		import com.liferay.portal.model.Role;
    		import com.liferay.portal.util.PortalUtil;
    		import com.liferay.portal.service.RoleLocalServiceUtil;
    		import com.liferay.portal.service.UserGroupLocalServiceUtil;
    		import com.liferay.portal.service.GroupLocalServiceUtil;
    		import com.liferay.portal.service.RoleLocalServiceUtil;
    		import com.liferay.portal.kernel.exception.PortalException;
    		import com.liferay.portal.kernel.exception.SystemException;
    
    		String groups = "groupnames,as,csv";
    		String[] groupNames = groups.split(",");
    		long companyId = PortalUtil.getCompanyId(actionRequest);
    
    		for(String groupName : groupNames){
    			try{
    				Role role = RoleLocalServiceUtil.getRole(companyId, groupName);
    				UserGroup userGroup = null;
    				try {
    					userGroup = UserGroupLocalServiceUtil.getUserGroup(companyId, groupName);
    				} catch (PortalException e1) {
    					out.println(e1.getMessage());
    					out.println("Creating Group : " + groupName);
    					userGroup = UserGroupLocalServiceUtil.addUserGroup(PortalUtil.getUserId(actionRequest), companyId, groupName, groupName);
    				} catch (SystemException e1) {
    				}
    
    				long[] userGroupIds = new long [1];
    				userGroupIds [0] = GroupLocalServiceUtil.getUserGroupGroup(companyId,userGroup .getUserGroupId()).getGroupId();
    
    				GroupLocalServiceUtil.addRoleGroups(role.getRoleId(),userGroupIds);
    				out.println("Added Group [" +userGroup.getName() + "] to Role["+ role.getName()+"]");
    			}
    			catch (PortalException e) {
    				out.println(e.getMessage());
    			} catch (SystemException e) {
    				out.println(e.getMessage());
    			}
    		}
    	
    
  • Run the Script
  • Goto Contol Panel -> Server Administration -> Script
    Select Beanshell in the dropdown list and paste the code.

  • Output
  • If you want to inject any Custom Objects into beanshell then just add it to the portletObjects Map in
    com.liferay.portlet.admin.action.EditServerAction
    
  • protected void runScript(
    			PortletConfig portletConfig, ActionRequest actionRequest,
    			ActionResponse actionResponse)
    		throws Exception {
    
    		String language = ParamUtil.getString(actionRequest, "language");
    		String script = ParamUtil.getString(actionRequest, "script");
    
    		PortletContext portletContext = portletConfig.getPortletContext();
    
    		Map<String, Object> portletObjects = ScriptingUtil.getPortletObjects(
    			portletConfig, portletContext, actionRequest, actionResponse);
    
    		UnsyncByteArrayOutputStream unsyncByteArrayOutputStream =
    			new UnsyncByteArrayOutputStream();
    
    		UnsyncPrintWriter unsyncPrintWriter = UnsyncPrintWriterPool.borrow(
    			unsyncByteArrayOutputStream);
    
    		portletObjects.put("out", unsyncPrintWriter);
    
    		try {
    			SessionMessages.add(actionRequest, "language", language);
    			SessionMessages.add(actionRequest, "script", script);
    
    			ScriptingUtil.exec(null, portletObjects, language, script);
    
    			unsyncPrintWriter.flush();
    
    			SessionMessages.add(
    				actionRequest, "script_output",
    				unsyncByteArrayOutputStream.toString());
    		}
    		catch (ScriptingException se) {
    			SessionErrors.add(
    				actionRequest, ScriptingException.class.getName(), se);
    
    			_log.error(se.getMessage());
    		}
    	}


Installing Liferay-Tomcat bundle as a Windows Service

Hi

Here I will explain you how to install Liferay6.1(Tomcat bundle) as a Windows Service.

Assumptions:

  1. You already have the liferay 6.1 bundle downloaded (If not, download it from here).
  2. You already have a Tomcat7 server (windows zip) downloaded  (If not, download it from here).

Procedure:

  • Extract your liferay bundle and tomcat to any chosen location.

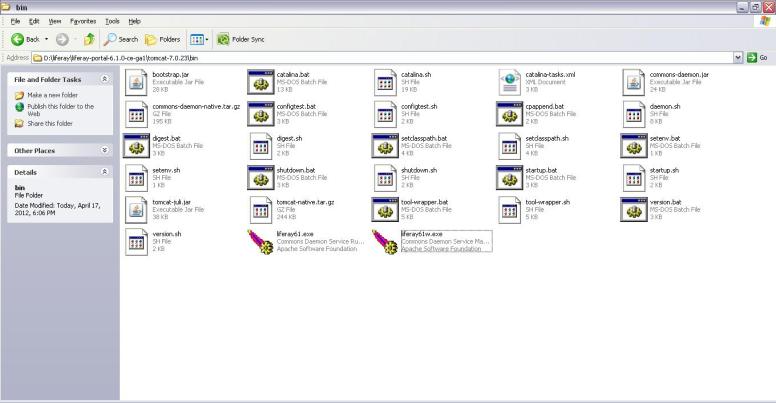
  • Copy tomcat7.exe  and tomcat7w.exe from tomcat to your liferay-portal and rename them to liferay61 and liferay61w respectively (If you wish them not to rename then leave them as is).

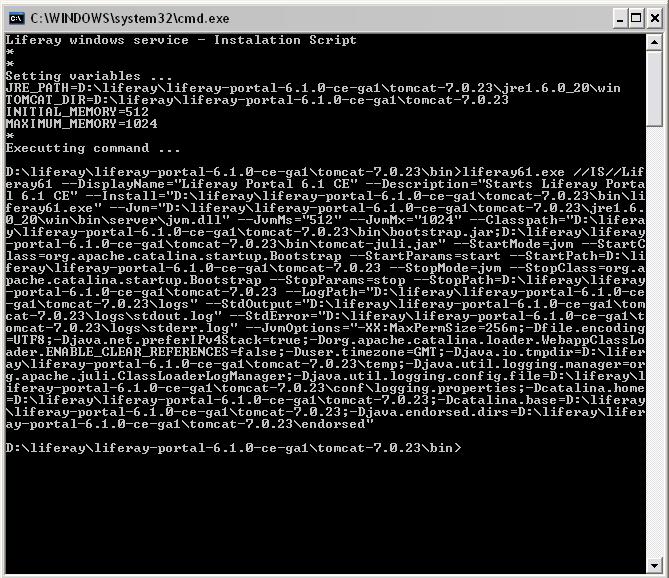
  • Create liferay-windows-service.bat in liferay-portal/tomcat/bin directory and copy the below content to that file
@ECHO OFF
CLS
@ECHO Liferay windows service - Instalation Script
@ECHO *

@SET "SERVICE_NAME=Liferay61"
@SET "SERVICE_DISPLAY_NAME=Liferay Portal 6.1 CE"
@SET "SERVICE_DESCRIPTION=Starts Liferay Portal 6.1 CE"

@SET "TOMCAT_DIR=D:\liferay\liferay-portal-6.1.0-ce-ga1\tomcat-7.0.23"

@SET "JRE_PATH=D:\liferay\liferay-portal-6.1.0-ce-ga1\tomcat-7.0.23\jre1.6.0_20\win"
@SET "INITIAL_MEMORY=512"
@SET "MAXIMUM_MEMORY=1024"

@ECHO *
@ECHO Setting variables ...
@ECHO JRE_PATH=%JRE_PATH%
@ECHO TOMCAT_DIR=%TOMCAT_DIR%
@ECHO INITIAL_MEMORY=%INITIAL_MEMORY%
@ECHO MAXIMUM_MEMORY=%MAXIMUM_MEMORY%
@ECHO *

@ECHO ON
@ECHO Executting command ...

liferay61.exe //IS//%SERVICE_NAME% --DisplayName="%SERVICE_DISPLAY_NAME%" --Description="%SERVICE_DESCRIPTION%" --Install="%TOMCAT_DIR%\bin\liferay61.exe" --Jvm="%JRE_PATH%\bin\server\jvm.dll" --JvmMs="%INITIAL_MEMORY%" --JvmMx="%MAXIMUM_MEMORY%" --Classpath="%TOMCAT_DIR%\bin\bootstrap.jar;%TOMCAT_DIR%\bin\tomcat-juli.jar" --StartMode=jvm --StartClass=org.apache.catalina.startup.Bootstrap --StartParams=start --StartPath=%TOMCAT_DIR% --StopMode=jvm --StopClass=org.apache.catalina.startup.Bootstrap --StopParams=stop --StopPath=%TOMCAT_DIR% --LogPath="%TOMCAT_DIR%\logs" --StdOutput="%TOMCAT_DIR%\logs\stdout.log" --StdError="%TOMCAT_DIR%\logs\stderr.log" --JvmOptions="-XX:MaxPermSize=256m;-Dfile.encoding=UTF8;-Djava.net.preferIPv4Stack=true;-Dorg.apache.catalina.loader.WebappClassLoader.ENABLE_CLEAR_REFERENCES=false;-Duser.timezone=GMT;-Djava.io.tmpdir=%TOMCAT_DIR%\temp;-Djava.util.logging.manager=org.apache.juli.ClassLoaderLogManager;-Djava.util.logging.config.file=%TOMCAT_DIR%\conf\logging.properties;-Dcatalina.home=%TOMCAT_DIR%;-Dcatalina.base=%TOMCAT_DIR%;-Djava.endorsed.dirs=%TOMCAT_DIR%\endorsed"

  • Edit the file according to your requirements and run it.

  • Congratulations you have successfully installed Liferay 6.1 as a windows service

  • Run liferay61w to configure any settings.